Saturday, March 30, 2013

Pineapple Bran Muffins

Pineapple Bran Muffins from Buttercream Lane and Fact Woman Blogs
There is a wonderful hotel/ resort here in Colorado and they make the best Bran Muffins. We go for one night every year to clebrate our anniversary. I know how boring that sounds, to go to a wonderful hotel and order a bran muffin, but they are that good. I've spent quite a few years trying to duplicate them and this is pretty dang close! They are moist, full of flavor and so good that you forget that they're good for you!

INGREDIENTS
  • 1 cup wheat bran
  • 1 cup oat bran
  • 1 cup whole wheat flour
  • 2 teaspoon baking soda
  • 1 teaspoon baking powder
  • 1/2 teaspoon salt
  • 3/4 tsp cinnamon
  • 1 egg
  • 1/2 cup crushed pineapple with juice squeezed out
  • 1/3 cup melted butter
  • 2/3 cup yogurt
  • 1/3 cup honey
  • 1/3 cup molasses
  • 1/2 cup of raisins- Optional
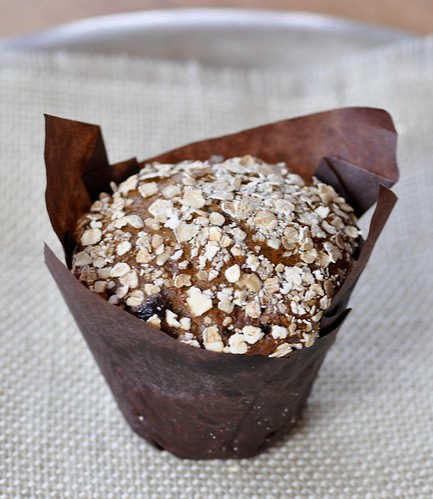
  • 1/3 cup rolled oats for tops
INSTRUCTIONS
  1. Preheat oven to 375° 
  2. Grease or paper a 12 standard muffin pan. I always spray the paper lightly if I use papers. 
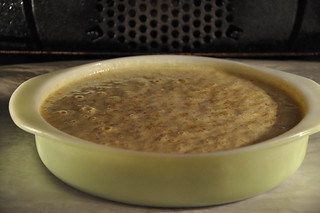
  3. On a cookie sheet in the oven~ 7 mins or in a large frying pan over medium high heat, toast the Oat and wheat bran until lightly golden brown. This gives the muffins a nutty flavor.
  4. Mix all dry ingredients together in a large bowl.
  5. Drain and Squeeze the juice from the 8 oz can of pineapple
  6. In a small bowl, place the egg, yogurt, honey, molasses and melted butter, beat to combine. 
  7. Add the wet ingredients to the dry ingredients and then add the raisins or the dried cherries. Stir gently until just combined. Don’t over stir! 
  8. Scoop the batter into the muffin tins/ papers and sprinkle the rolled oats over the tops. 
  9. Bake in the oven for 20-25 mins until a toothpick or tester inserted into the center comes out with just a few crumbs on it. Not wet! 
  10. Let sit for 10 mins and remove from the pan. Serve warm or let cool. They will stay fresh in a sealed container in the fridge for 2 weeks. 

Monday, March 25, 2013

Banana Crunch Muffins


I love this muffin recipe. You can make a batch and they stay fresh in the fridge for a week or so. They're perfect for a grab and go breakfast on your way out the door. They also freeze beautifully.
3 cups all-purpose flour
1 3/4 cups white sugar
1 teaspoon baking soda
2 teaspoons baking powder
3/4 teaspoon salt
3/4 cup milk
2 eggs, lightly beaten
1 teaspoons vanilla extract
1/2 cup melted butter, cooled plus 1/2 cup applesauce  OR 1 cup melted butter                                  
3 bananas- mash 2 with a fork and dice one
1 cup chopped pecans (you can also use walnuts or almonds)
1 cup granola- any kind is fine
1 cup shredded coconut plus 1/4 cup shredded coconut to top muffins with before baking.
  • Preheat oven to 350 degrees F (175 degrees C)
  • Melt 1/2 cup of butter and set aside to cool. (or 1 cup if you are skipping the applesauce)
  • Line 24 muffin cups with paper liners.
  • In a medium size bowl stir together your dry ingredients: flour, sugar, baking soda, baking powder, and salt. 
  • Mash 2 bananas with a fork and chop the remaining banana
              
  • In a separate bowl whisk the eggs lightly then add the remaining wet ingredients: milk, vanilla, melted butter, apple sauce, and the mashed bananas- save the diced banana for just one more step. 
  • Add the wet ingredients to the dry ingredients and stir just until combined. There will be a few lumps. 

  • Fold in the diced banana, granola, nuts, and 1 cup of the coconut. 


  • Scoop into the prepared muffin cups and sprinkle the top with the remaining coconut.
  • Bake 20 to 25 minutes in your preheated oven, until a toothpick or knife inserted in the center of a muffin comes out clean.
Makes 24 muffins

Thursday, March 21, 2013

Easter Decor Ideas- White and Blue


Untitled

Last Easter I wanted to use robin's egg blue and white for the tables. I love that color combination.   I also wanted to use eggs to hold the flowers. After a couple dozen eggs and failures, I came up with this design.  I took 2 dozen raw eggs and broke off a small bit at each end, about the size of a dime or nickle. I used a knife to tap around in a circle at each end then took it off. I poured out the raw eggs to use for a breakfast casserole and then boiled the eggs shells for 5 minutes, I'm kind of a germaphobe. I then dyed the egg shells and set them to dry.

I made a bunch of white tissue paper flowers- (Here's a tutorial on how to make them) with wire stems and also cut a few fresh ones from the yard.   Half the tables had the white flowers and half had fresh. Yes, I have a lot of people for Easter and thus lots of tables.
Untitled


Untitled


To put them together, I filled vintage sundae dishes with crinkle paper (my husband's dad and grandpa used these at their old pharmacy soda fountain in the 1950's)  I stuck the paper flowers through the top and bottom holes in the egg down through the crinkle paper to hold it up. For the fresh flowers, I took a water tube, stuck it deep into the crinkle paper. and slid the egg over the top of it. I then could slide the flowers into the water tube to stay fresh.

Untitled

I also took a large vase and filled it with crinkle shreds and white paper flowers.
Untitled

I sat one blue egg on top for Easter! I love how it turned out.
Sorry about the crappy photos!
May God bless you and your family this Easter! The celebration of the resurrection of the Lord Jesus Christ who died for each of out sins so that we might have eternal life thorough grace if we choose to believe in Him as our personal savior.
Happy Easter!

Monday, March 18, 2013

Orange Almond Cake- Gluten Free

A Gluten Free Orange Almond Cake from Buttercream Lane and Factwoman

It's Friday evening. We've eaten dinner, kitchen's all cleaned up, the last load of laundry is in the dryer, I put on some sweats and I sit down to watch, Say Yes to the Dress, and have some Pinterest Time. I 'm looking through the pins and see a delicious looking Orange Cake and have to have some- RIGHT NOW! I look at the ingredients and have everything except the Almond meal, but I have almonds, so I'm all set. I grind up the almonds THEN read the next step- WHAT??? I have to Boil the oranges for 15 minutes, drain, refill, bring to a boil for another 15 minutes, then let them cool!!!????  (OK, I should have read the recipe instead of just looking at the pictures of each step- that was not a step in the photos- My Bad.)  No way was I doing all that! So I do some research.

You're supposed to boil the oranges to soften the skins up and make it easier to cook. But, I think to myself what a wonderful world.... Woops- I''m not supposed to be singing right now... I think to myself- if you boil the oranges and drain the water- wouldn't all the flavorful oils from the peel go down the drain? That's my conclusion.  So I came up with a new plan, played with the recipe, made it 3 times and here is a delicious alternative that only took 8 mins to get into the oven and that  time includes grinding the almonds. Plus Bonus- I used the food processor for every step. less to clean up! I could have made the original recipe faster but where would the fun be in that?!!!

Flourless Orange Almond Cake                                               

Inspired by Scandi Home's Flourless Orange Cake

Ingredients:

  • 2 whole medium size oranges If you only have big ones just use 1 1/2 
  • 3 eggs
  • 1 cup sugar
  • 3 cups of almond meal or 3 cups of whole almonds that you'll grind up
  • 1 tsp Baking Powder

Instructions:

  1. Grease and flour a 9" spring form pan-  You can do a regular 9 " round but it is harder to get it out of the pan in pretty slices. 
  2. If you have almond meal- skip this step- Place 3 cups of whole almonds into the bowl of your food processor. Pulse until the almonds are a fine even texture. I actually left mine a little rougher because I like more texture in  the final cake. It's up to you but DON"T over process or you'll be eating almond butter sandwiches for the rest of the month! Remove the meal from the bowl and set aside. 
  3. Stir 1 tsp of baking powder into the meal.
  4. Zest all skin off of the 2 oranges and place in a bowl.
  5. Preheat oven to 340º. 
  6. Peel the oranges then slice or pull into the sections and place the pieces into the Food processor bowl. There will be some almond meal in there but so what, it's all going to be mixed together in a minute. Pulse until the oranges are a nicely pureed. Pour the puree in with the zest and set aside. Try to get as much of the orange out of the bowl as you can. 
  7. Crack 3 eggs into the processor bowl and add the 1 cup of sugar. Turn on processor and process until the eggs and sugar are thick and pale yellow. About 45- 60 seconds. 
  8. Add the almond meal, the orange puree and zest into the egg mixture and process for about 10-15 seconds until combined. 
  9. Pour batter into prepared cake pan.
  10. Bake for 50 minutes or until a toothpick can be inserted into the center and come out clean.
A Gluten Free Orange Almond Cake from Buttercream Lane and Factwoman
Serve dusted with Powdered sugar.
A Gluten Free Orange Almond Cake from Buttercream Lane and Factwoman


Thursday, March 14, 2013

Creamy Mustard Sauce for Corned Beef

I've made this sauce for over 30 years. It adds a sharpness and tang to ham, spinach, corned beef or sausage and eggs.  It's got that perfect balance of sweet, tang, and spice.

DSC_9183.jpg

Ingredients:

2 TBS Dry Mustard
1 TBS Corn Starch
1 cup of light cream or you can just use milk too.
1 egg yolk
3 TBS Sugar
1/2 cup of cider vinegar, heated
1/4 tsp salt


Instructions:


  1. Blend the dry mustard, corn starch and half of the milk or cream in the bottom of a cold saucepan until smooth
  2. Turn burner onto medium and add in the rest of the milk or cream and stir to combine. 
  3. Put vinegar into microwave for 30 seconds or heat in another pan on stove. 
  4. Place egg yolk into a small bowl and beat well. 
  5. Once the cream mixture is hot and thickening, take 2 TBS and add to the egg yolk beating it with a fork while you add it, to temper the egg. 
  6. Add the egg yolk mixture into the pan with the cream and stir well 
  7. Add the sugar and stir over the heat until mixture is thickened 1 minute. 
  8. Add the vinegar and stir to combine. 
Serve in a small pitcher to pour over the meat you want to serve it with. 
DSC_9182.jpg

Tuesday, March 12, 2013

Pineapple Coconut Sheet Cake or Pina Colada on a Plate


Pineapple Coconut Sheet Cake from Fact Woman and Buttercream Lane Blogs
It's Sheetcake Week here! Actually, I made 2 different kinds of cake for a lunch I held for some bible study friends this week so, I thought I'd post the recipes I came up with. I also made the Biscoff Sheet Cake you can find here!   

This is a dense full of flavor sheet cake. Packed with coconut and chunks of pineapple, it's a slice of a tropical paradise on a plate.   You can top this cake with a thinner Coconut Glaze as shown or with a slightly thicker Icing.  It's good either way. 

      Pineapple Coconut Sheet Cake


INGREDIENTS:

Cake:
  • 2 1/2 cups Flour
  • 2 cups White Sugar
  • 1 tsp Baking Powder
  • 1 tsp Baking Soda
  • 1/2 tsp Salt
  • 1- 20 oz can of Crushed Pineapple in Natural Juice not syrup- Don't drain. 
  • 1/3 cup of Shredded Coconut
  • 1/2 cup Butter- 1 stick
  • 1/2 cup Sour Cream- can be low fat
  • 2 large eggs
Glaze:
1 cup Butter- 2 sticks
1 1/2 cups of White Sugar
2/3 cup  coconut milk- or if you thought you had coconut mil but it turned out to be Coconut Ginger Soup instead- just use 2/3 cup milk and a 1/2 tsp of coconut extract. 
1 tsp vanilla
1/2 cup flaked coconut- I like to toast mine but you can add it straight out of the bag. 
  OR
Icing:

1/2 cup butter- 1 stick
1/3 cup coconut milk or regular milk and 1/2 tsp coconut extract
2  cups  powdered sugar
1/2 cup flaked coconut
1 tsp vanilla

INSTRUCTIONS:
Cake:
  1. Preheat oven to 400º F 
  2. Grease and flour a 12x17 Jelly roll pan, or a 9x13 pan (thicker cake) or a 14"x11" pan- just use what you have!
  3. In a large bowl place the 2 cups flour, 2 cups white sugar the 1 tsp baking soda, 1 tsp baking powder and the 1/2 tsp of salt. Mix together with a whisk until well combined.
  4. In a small microwavable bowl, place the butter.  Heat on high for 45-60 seconds until the butter is melted.  Remove and set aside
  5. In a small bowl. Mix together the 1/2  cup sour cream and the 2 eggs until well combined. Pour into the large bowl with the dry ingredients.  Don't stir yet!
  6. Open the can of crushed pineapple and dump it into the bowl- juice and all. 
  7. Pour the melted butter on top and then mix everything together until well combined. 
  8. Pour batter into the prepared pan and put into oven. 
  9. Bake for 20- 28 minutes depending on how big a pan you have. The larger the pan- the thinner the batter will spread and the faster it will cook. 
Glaze:
  1. In a large saucepan, over medium place the 1 cup butter, 2/3 cup milk and the 1 1/2 cups of sugar. Bring to a boil stirring constantly and boil for 2 mins.
  2. Remove from the heat and add the vanilla and coconut and stir until smooth. 
  3. Using a fork, poke holes every inch or so into the top of the cake.
  4. Immediately pour over the glaze over the hot cake and spread around to cover the top. 
Icing:
  1. In a large saucepan, over medium place the 1/2 cup butter, 1/3 cup coconut milk and bring almost to a boil.
  2. Remove from the heat (take it off the stove so you don't have powdered sugar all over it to clean up from the grates and burners- Yep that's what I do sometimes and it's a mess)  
  3. Add 2 1/2 cups of powdered sugar and 1 tsp of vanilla (and the coconut extract if you're using regular milk) to the hot mix and stir until smooth. 
  4. Add the coconut and stir to combine.
  5. Immediately pour over the hot cake and spread around to cover the top. 
Eat warm or let cool before serving. 

Sunday, March 10, 2013

Biscoff Sheet Cake - Easy and Delicious


Biscoff Sheet Cake from Fact Woman and Buttercream Lane Blogs
Sheet cakes are the unappreciated younger sibling in the cake world. They aren't fancy or as pretty as a tall, slender 3 layer cake but they are easy and, in my opinion taste just as good as a layer cake and take a quarter of the time to make and frost! 

My husband is from Nebraska and let me tell you, sheet cakes are BIG there! Not as big as Jello Salads but almost!  When you're trying to get a huge dinner made by noon, for a bunch of hungry cattle ranchers who've been out feeding and moving cattle since the sun came up, a sheet cake is perfect. It mixes together in 5 minutes and bakes for 20 leaving the oven open for a casserole or rolls or whatever else is being made for the noon meal that day. 

When we got married my mother-in=law gave me all her recipes for sheet cakes and casseroles that my husband had grown up eating. I've taken her peanut butter sheet cake and vanilla sheet cake recipes and played with them to make this Biscoff Sheet Cake. It is so good!!! The cookie caramel flavor of the Biscoff makes this a wonderful cake! 


Biscoff Sheet Cake   


INGREDIENTS
Biscoff Sheet Cake from Fact Woman and Buttercream Lane Blogs
Cake:
  • 2 cups flour
  • 2 cups brown sugar
  • 1 tsp baking soda
  • 1/2 tsp salt
  • 3/4 cup Biscoff Spread
  • 1 cup butter- 2 sticks
  • 1/2 cup water
  • 1/2 cup milk
  • 1 cup sour cream- can be low fat
  • 2 large eggs
Icing:
1/2 cup butter- 1 stick
2/3 cup Biscoff Spread
1/3 cup  milk
2 1/2 cups  powdered sugar
1 tsp vanilla

Cake:
  1. Preheat oven to 400º F 
  2. Grease and flour a 12x17 Jelly roll pan, or a 9x13 pan (thicker cake) or a 14"x11" pan- just use what you have!
  3. In a large bowl place the 2 cups flour, 2 cups brown sugar the 1 tsp baking soda and the 1/2 tsp of salt. Mix together with a whisk until well combined and the brown sugar lumps are broken down.
  4. In a medium microwavable bowl, place the butter and water. Heat on high for 2-3 mins until the butter is melted and it is almost boiling.  You can also do this in a small saucepan on the stove if you wish. Remove from microwave and stir in the Biscoff Spread. Stir until the Biscoff is completely melted and mixture is smooth. Pour on top of the flour and sugar mixture. Don't stir yet!
  5. In that same small bowl. Mix together the 1/2 cup milk, 1 cup sour cream and the 2 eggs until well mixed. Pour into large bowl with the rest of the ingredients. 
  6. Now you can stir it all together until well combined. 
  7. Pour batter into the prepared pan and put into oven. 
  8. Bake for 20- 28 minutes depending on how big a pan you have. The larger the pan- the thinner the batter will spread and the faster it will cook. 
Icing:
  1. In a large saucepan, over medium place the 1/2 cup butter, 1/3 cup milk and 2/3 cup biscoff spread bring almost to a boil- it may look kind of chunky and broken but no worries. 
  2. Remove from the heat (take it off the stove so you don't have powdered sugar all over it to clean up from the grates and burners- Yep that's what I do sometimes and it's a mess)  
  3. Add 2 1/2 cups of powdered sugar and 1 tsp of vanilla to the hot mix and stir until smooth. 
  4. Immediately pour over the hot cake and spread around to cover the top. 
Eat warm or let cool before serving. 

Monday, March 04, 2013

Salted Caramel Pudding or Butterscotch Pudding Recipe

My daughter Hannah came for a visit the other night and was hungry for Butterscotch pudding. I of course only had vanilla boxed pudding so I got on the internet and looked at dozens of recipes and took the three I liked best and combined them into this one. It's the perfect combination of salty and sweet and buttery caramel butterscotch flavors. It tastes like salted caramels! Start to finish in under 15 mins. Hannah was thrilled but at the same time, sad that I've ruined boxed pudding for her. It's scary to think that we came so close to settling for a box and never discovering this amazing pudding!

  Hannah's Butterscotch Pudding

  • 3 1/2 cups milk- 1%, whole or what ever you’ve got (For a richer pudding use 2 1/2 cups milk and 1 cup cream
  • 1 stick butter
  • 1 1/4 cups light brown sugar packed
  • 3 egg yolks
  • 1/3 cup cornstarch
  • 1/8 teaspoon salt
  • 2 teaspoons vanilla extract
Directions
·      Separate 3 eggs and put the 3 egg yolks into a medium bowl. Set aside.
·      Stir 1/2 cup cold milk with 1/3  cup corn starch until a smooth paste. Set aside.
·      In a microwavable container, add 3 cups milk (or cream and milk mixture) and Microwave for 2-4 minutes until skim forms on top and milk is hot.  Remove and set aside.
·      In a large, heavy saucepan, over medium heat, melt the butter. Stir in the brown sugar, raise the heat to medium-high, and cook 3 to 7 minutes, stirring constantly, to caramelize the mixture. You'll smell a characteristic nutty-caramel odor when the butter browns, signaling that the mixture is ready. Turn heat down to medium.
·      Immediately, gradually add the hot milk into the butter/brown sugar mixture stirring constantly.
·       Take the egg yolks and whisk in about 1/2 cup of the hot mixture. Whisk in the cornstarch paste and salt until dissolved. Whisk the cornstarch/ egg yolk mixture back into the hot mixture in the saucepan. Whisking constantly, cook over medium-high heat until pudding is thick and just boiling. You will know that it’s done and  thick enough when the spoon leaves trail marks on the bottom of the pot and the mixture will have a few large bubbles boiling up to the top.
·      Turn off the heat and whisk in the vanilla extract. Pour into one bowl or 6 to 8 ramekins, or mugs and  press waxed paper over the top to prevent a skin from forming. Serve warm or chill at least 2 hours or overnight. Warm or cold it's delicious.I had it with a small dollop of whipped cream. I think I'm going to put some chocolate shavings on it next! 

Blogging tips