Thursday, February 28, 2013

Easy, Fast Fluffy Pancakes to eat Plain or to add Blueberries, Chocolate Chips or more to!

DSC_9007.jpg

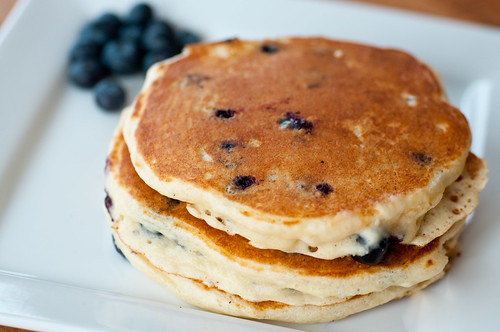
Pancake mix might seem easier than pancakes from scratch, but it really only takes about 3 minutes longer to make them from scratch and they taste so much better!
Here is the quick and easy pancake recipe that I have used for over 30 years and the one that my mom and grandma have used for longer than that! The original recipe called for a lump of butter the size of a small egg.

When all my kids were at home, and mornings were busy, I'd measure out the dry ingredients into my pour bowl and mix the wet ingredients in a cup that I'd place in the fridge. In the morning all I had to do is mix the 2 together and stir.

This is a great basic plain pancake recipe. It's perfect to play with! Want blueberries?  Add a cup of them to the batter. Chocolate chip pancakes?- Add 1/2 cup of mini chocolate chips or 3/4 cup regular ones. You can add cinnamon and spices to them or anything you like.

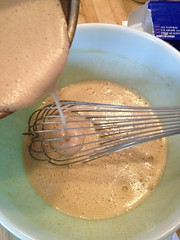
I mix mine in a plastic bowl with a spout so I can  pour it right out onto my griddle.

This amount makes 12-14 Large 5"-6" pancakes    
  Click Here for a Printable Copy of this recipe

Ingredients:

  • 2 cups flour
  • 4 tsp baking powder
  • 4 Tbs sugar that's 1/4 cup to make it easier
  • 1 tsp salt
  • 2 eggs
  • 1- 1 1/2 cups milk-  Add in the smaller amount and then add in more until the batter is the consistency of cake batter. It should pour out and spread a little but it shouldn't run all over the place.
  • 4 TBS melted butter (1/4 cup)- If you don't want to melt butter, you can add 4 Tbs of vegetable oil instead

Instructions:

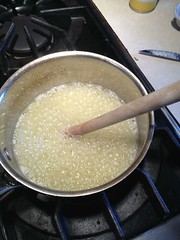
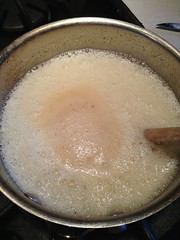
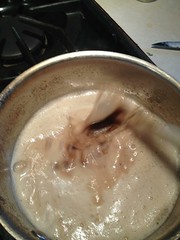
  1. Place the butter into a microwave safe dish and cover. Microwave for 45 seconds to melt.
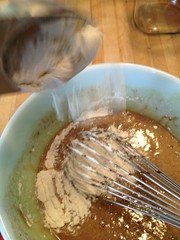
  2. Into a bowl place the flour, baking powder, sugar and salt. 
  3. Stir to combine.
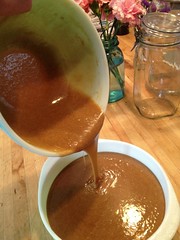
  4. Add in the eggs, milk and melted butter. 
  5. Stir until combined
  6. Pour the batter onto a medium hot griddle or frying pan. A drop of water should dance on it for about 2 seconds then evaporate.  
  7. Wait until bubbles form on the top of the pancakes and the sides are set up. peek under to see if the bottom is golden brown. Once it is, flip and cook until the second side is golden. 
  8. Flip onto a plate and eat it up.
That's it!! I told you it was easy.


Monday, February 25, 2013

30 minute Tuscan Tortellini with Kale and Artichokes

The Tuscany region of Italy is known for it's olive oils, pecorino cheeses and their red wines. They also use lots of tomatoes and cannellini beans in their dishes. I decided to make a dish with these items and a few others. It's a quick and easy one pot meal that is ready in under 30 mins and good for you. What more can you ask for on a busy weeknight?!


Tuscan Tortellini with Kale and Artichokes - A one pot meal ready in under 30 mins! From Buttercream Lane and Factwoman

Ingredients

  • 3 TBS extra vergin olive oil
  • 1- 12 oz bag of frozen tortellini- thawed
  • 1- onion sliced thinly
  • 1 tsp of Italian herbs
  • 1- 9oz package of frozen artichoke hearts- thawed (optional- if you don't like artichokes skip them)
  • 1- 15 oz can of cannellini beans or white kidney beans- drained and rinsed
  • 1- 14.5 oz can of diced or crushed  tomatoes  with Italian Herbs
  • 1- 10-14 oz bag of pre-washed, pre-trimmed Kale 

Directions

    Italian Tortellini with Kale and Artichokes from Buttercream Lane
    Italian Tortellini with Kale and Artichokes from Buttercream Lane
  1. In a really large pan, over medium to medium high heat add 1 1/2 TBS of the olive oil and the thawed tortellini and brown them slightly.
  2. Remove tortellini from pan and set aside. 
  3. Add the remaining oil and the onions to the pan and saute the onions until translucent and slightly browned. 
  4. Add the garlic and Italian Herbs and saute for 20 seconds. 
  5. Add the kale, tomatoes, cannellini beans and the artichokes to the pan and stir for 1 minute
  6. Add the tortellini and stir to combine. 
  7. Continue to stir until kale is cooked about 1-2 mins more. 
  8. Remove from heat and serve! 
  9.  Italian Tortellini with Kale and Artichokes from Buttercream LaneItalian Tortellini with Kale and Artichokes from Buttercream Lane
Untitled

Saturday, February 23, 2013

Caramel Browned Butter Cake

Caramel Browned Butter CakeCaramel Browned Butter Cake
I was watching Top Chef the other night and one of the contestants made a browned butter cake. The judges raved about it and of course,  I couldn't get it our of my mind!  I looked up the recipe online and realized it was very similar to my grandmas brown sugar butter cake. Grandma's used less butter but it had brown sugar and I do love the taste of brown sugar. I ended up making grandma's recipe but instead of just melting the butter, per her instructions, I browned it!  The browned butter with the brown sugar gave it a caramel taste that would be tough to beat! The cake turned out delicious. I'm always happy when experimenting works out!  I served it with some of the Blueberry Sage Preserves (Recipe Here) The preserves take 30 mins which is the exact same amount of time that the cake takes to bake- perfect!

Caramel Browned Butter Cake

  • 3/4 cup of butter
  • 1 cup of packed brown sugar- light dark doesn't matter
  • 4 eggs
  • 1 tsp vanilla bean paste or vanilla extract
  • 1/2 cup of flour
  • Preheat oven to 350º
  • Grease and flour a 9" round or square pan 
  • In a medium bowl, whisk together the brown sugar, eggs and vanilla until combined.
  • Place the butter into a medium saucepan and put it over medium heat. Stir constantly until it's a medium golden brown. The butter will foam up so you have to stir it very briskly to see the color change under the top layer of foam so watch carefully.
Untitled

  • Once the butter is golden- IMMEDIATELY  remove from heat and slowly pour into the beaten egg and sugar mixture while you whisk it. Pour slowly so you don't splash and burn yourself and so that you stir enough to not end up with scrambled eggs! Watch carefully as you get to the end and don't add the darker solids that will be at the bottom to the batter. The dregs of the browned butter!
Untitled
  • Add the 1/2 cup of flour and whisk together until just combined. 
  • Pour into a greased and floured 9" round or square pan. 
  • Bake at 350º for 30 minuted until cake is firm
  • Let cool for 10 minutes and remove from pan. 
  • Serve with whipped cream or Blueberry Sage Preserves or BOTH! 
  • Caramel Browned Butter Cake from Factwoman at Buttercream Lane blog

Thursday, February 21, 2013

Blueberry Sage Preserves


I adore blueberries, especially during the winter. Their flavor and color are just beautiful. I bought a ton on sale this week and decided to make a lovely batch of preserves with some of them. As I thought about the flavors I wanted to put together, I decided upon some sage- which is rich and earthy to balance the sweetness of the berries, honey- to sweeten it and thicken it,  some lemon- for a little fresh zing and a bit of bourbon- to add some smoky notes. It turned out exactly how I pictured the flavors in my mind (that sometimes doesn't happen) and it only took 30 mins.

Blueberry Sage Preserves 

makes 2 1/4 half pints
  • 2 pints of fresh blueberries
  • 3/4 cup of honey
  • 1/2 -1 tsp of crushed dried sage
  • 3 TBS Bourbon
  • the zest and juice of 1 Lemon
  1. Wash the blueberries and place in a large saucepan, add the honey, bourbon and the dried sage. Stir to combine. 
  2. Cook over medium heat, stirring constantly until the mixture reaches a 215º  at sea level or take 2 degrees off of that for every 1000 feet in elevation. I'm at 6000 feet so I cooked it to 201º. If you don't have a thermometer, it will be thickened and when a small amount is left to cool on a saucer, it will be thick like jam. It will also start spattering as it boils. 

  3. Wash the berries 

    add honey and sage

    cook over medium heat until thickened.
  4. Remove from the heat and add the lemon juice and the zest, stir to combine
  5. Pour into hot jars and seal .. 

  6. Add lemon juice and zest.
    Pull out seeds!

    pour into hot jars,

    clean off rim before placing seal or lid on
  7. Either keep in the fridge and use within 3-4 weeks or process in a hot water bath for 15 mins (processing time will need to be extended by one minute for each 1,000 feet above sea level.)

Saturday, February 16, 2013

Angry Cider and Bourbon

Angry cider and bourbon Sometime you just want a cocktail that's sweet and smokey, easy and delicious!

I love Angry Orchard's Crisp Apple hard cider and I love a great Bourbon. I've been drinking Angry Orchard Hard Ciders for quite a while. Their Crisp Apple is the perfect hard cider. Not to fizzy, not too sweet yet it has great apple flavor. I was in the mood for some but also was in the mood for some bourbon. I recently discovered Breckenridge Distillery's Small Batch Bourbon. I can see why it has won so many awards already! If you haven't tried it yet, you don't know what your missing. It has a light smokey flavor with hints of brown sugar and dried fruit with light pepper and ginger zing. It is almost sinful to mix it with anything but I was out of my other bourbons. I couldn't decide between these 2 drinks so I did what any smart person would do...I mixed them together!!!  I'm not sorry at all!

Here's what you need:
Angry cider and bourbon
 Take 1 oz of your favorite Bourbon and put it into a nice size glass.
Pour in  1 bottle of Angry Orchard Crisp Apple Hard Cider and drink!
Angry cider and bourbon
I told you it was simple!
BTW- These companies don't know me and didn't ask me to do this. I just love their products and wanted to share!!

Monday, February 04, 2013

Salted Nutella Truffles in Honor of World Nutella Day

Laura's Salted Nutella Truffles

Photo by Carly Bish from, my brother, Tom's wedding.  
These truffles were the first thing to go!

The basic process for making the truffles isn't hard, you just have to spend a little time in between stages. Believe me it's worth it.
Salted Nutella Truffles
makes about 30 truffles
- 1/2 cup cream
- 4 tbl. butter
- 9 oz. semisweet chocolate (I used chocolate chips)
- 1/4 cup Nutella
- good quality sea salt (optional)
- dark chocolate candy melts
1. Put the chocolate chips and the Nutella in the bowl.
2. Heat up the butter and cream. Cook it until it just start to boil around the edge of the pan.
3. Pour the cream & butter onto the chocolate & Nutella. Now this is the hard part. DON'T STIR IT!!!! Walk away for 5 minutes and let the cream do it's thing. 
4. Once five minutes have passed, take a whisk, and start stirring the now melted chocolate and cream together. It will look really funky for the first 60 seconds, then a magic moment happens and it becomes smooth and lovely ganache. 
5. Once the ganache is completely smooth, stick that bowl in the fridge for at least 3-4 hours, but overnight is better.
6. Once your ganache is hard, use a mini scoop or a melon baller to make one inch truffles. Dip your scoop in warm water between forming each one. Place them on a sheet pan. Once you have formed all of the truffles, put them in the fridge for at least 30 minutes to firm up a bit.
7. At this point, you can roll the truffles in cocoa powder, or, if you're feeling ambitious, you can dip them! I hate tempering chocolate, and I refuse to do it in my temperature extreme kitchen, so I cheated and dipped these in dark chocolate candy melts.You can melt it in the microwave, it works really well, and it tastes delicious! Just drop a truffle into your bowl of melted candy melts, fish it out with a fork, tap it on the edge of the bowl, to make the excess drip off, and gently place it onto a wax or parchment paper lined sheet pan. 
8. While your truffle is still wet, sprinkle a little sea salt on top. You won't regret it. 
9. Once you have dipped all of your truffles, refrigerate them for 10 minutes or so, then take them back out and trim the bottom if they got a little wonky. And you're done! People will be impressed, and you will be a little fatter, because if you're anything like me, you will sample about 20 of these... you know, just to make sure they're edible.
Blogging tips