Friday, November 27, 2015

Brandy Snaps with Cinnamon Eggnog Cream or Brandy Cream


I love brandy snaps.  They are light lacy crisp tubes that you can fill, leave unfilled and dip one end into melted chocolate or leave plain. They take a bit of practice but after one or two you'll find them very easy to make!

You really have to find some Golden syrup to make this recipe. Karo just doesn't work as well. I get mine at Cost Plus but Amazon has it as well.

This recipe makes 24 cookies.

  • 1 cup all-purpose flour
  • 1 teaspoon ground ginger
  • 2/3 cup sugar
  • 10 tablespoons unsalted butter
  • 1/2 cup Lyle’s Golden Syrup
  • 1/2 tsp lemon juice
  • Preheat oven to 350º 
  • Line 2 cookie sheets with parchment and then grease the handle of a wooden spoon well and set aside. 
  • Into a small bowl stir together the flour and the dried, ground ginger
  • Add the butter, sugar and golden syrup to a medium saucepan over medium-low heat and heat until the sugar is completely dissolved.  Don't stir too much or allow the mixture to boil or the sugar can crystalize.  This will take about 10-15 minutes
  • Once the sugar is dissolved, remove from the heat and stir in the flour and the lemon juice. 
  • Using a tablespoon, scoop 1 TBS  onto the cookie sheet.  Place 3-4 scoops 4" apart onto a cookie sheet. 
  • Bake for 10-12 minutes until cookies are golden brown, spread out and bubbling. 
  • Remove from oven and let sit for 2-3 minutes. The cookie needs to be just firm enough to remove, but pliable enough to shape. I use a thin knife or very thin spatula to carefully peel up an edge. If the edge doesn't stretch out it's time to shape!   
  • Roll the cookie around the greased spoon handle and set on a cooling rack. 
  • You have to move fast to get them all done before they harden up too much. 
Let the cookies cool completely before dipping one end into melted chocolate or filling with the Brandy cream or the Eggnog cream. 

Brandy Cream
1 1/2 cups whipping cream
2 TBS Brandy
1/3 cup sugar
Combine cream, brandy and sugar and whip until stiff peaks. 

Cinnamon Eggnog Cream
1 1/2 cups of whipping cream
2 TBS Brandy
3 TBS Eggnog
1/2 tsp of cinnamon
1/3 cup sugar
Combine all the ingredients and whip to stiff peaks. 


Thursday, October 29, 2015

Thanksgiving is coming!

After years of trying Pumpkin cheesecake recipes, I found this one and with a few changes came up with what I think is the best recipe out there.

Depending on the oven and the temperature of the ingredients, the cheesecake may bake about 15 minutes faster or slower than the instructions indicate; it is therefore best to check the cake 1 1/4 hours into baking. Although the cheesecake can be made up to three days in advance, the crust will begin to lose its crispness after only one day. To make slicing the cheesecake easy and neat, use a knife with a narrow blade, such as a carving knife; between cuts, dip the blade into a pitcher of hot water and wipe it clean with paper towels.
Makes one 9-inch cake, serving 12 to 16

Crust
3
ounces graham crackers(5 whole crackers), broken into large pieces
3
tablespoons granulated sugar 
2
ounces pecans ,chopped (about 1/2 cup)
1/2
teaspoon ground ginger 
1/2
teaspoon ground cinnamon
1/4
teaspoon ground cloves 
4
tablespoons butter, melted

Filling
1 1/3
cups granulated sugar 
1
teaspoon ground cinnamon
1/2
teaspoon ground ginger 
1/4
teaspoon ground cloves 
1/4
teaspoon ground nutmeg 
1/4
teaspoon allspice 
1/2
teaspoon salt
1
can pumpkin (15 ounces)
1 1/2
pounds cream cheese, 3-8oz packages , cut into 1-inch chunks and left to soften at room temperature, about 30 minutes
1
teaspoon vanilla extract
5 large eggs that have been brought to room temperature
1
cup heavy cream 


Before beginning crust, dry your pumpkin- This makes the filling thicker and creamier:
  • To dry your canned pumpkin: Line baking sheet with triple layer of paper towels. Spread pumpkin on paper towels in roughly even layer. Cover pumpkin with second triple layer of paper towels and press firmly until paper towels are saturated. Peel back top layer of towels and discard. Grasp bottom towels and fold pumpkin in half; peel back towels. Repeat and flip pumpkin onto baking sheet or into an extra mixing bowl; discard towel.
1. FOR THE CRUST: Adjust oven rack to lower-middle position and heat oven to 325 degrees. Spray bottom and sides of 9-inch springform pan evenly with nonstick cooking spray. Pulse crackers, nuts, sugar, and spices in food processor until evenly and finely ground, about fifteen 2-second pulses. Transfer crumbs to medium bowl, drizzle melted butter over, and mix with rubber spatula until evenly moistened. Turn crumbs into prepared springform pan and, using hand, spread crumbs into even layer. Using flat-bottomed ramekin or drinking glass, press crumbs evenly into pan bottom, then use a soup spoon to press and smooth crumbs into edges of pan. Bake until fragrant and browned about the edges, about 15 minutes. Cool on wire rack while making filling.
  • At this point, bring about 4 quarts water to simmer in stockpot for the Bain Marie. A bain-marie is the French term for a water bath.
2. FOR THE FILLING:  Whisk sugar, spices, and salt in small bowl; set aside.

3. In standing mixer fitted with flat beater, beat cream cheese at medium speed to break up and soften slightly, about 1 minute. Scrape beater and bottom and sides of bowl well with rubber spatula. Add about one third of sugar mixture and beat at medium-low speed until combined, about 1 minute; scrape bowl and add remaining sugar in two additions, scraping bowl after each addition. Add your dried, canned pumpkin and vanilla and beat at medium speed until combined, about 45 seconds; scrape bowl. Add 3 eggs and beat at medium-low until incorporated, about 1 minute; scrape bowl. Add remaining 2 eggs and beat at medium-low until incorporated, about 45 seconds; scrape bowl. Add heavy cream and bourbon and beat at low speed until combined, about 45 seconds. Using rubber spatula, scrape bottom and sides of bowl and give final stir by hand.

4. Set springform pan with cooled crust on an 18-inch-square doubled layer heavy-duty foil and wrap bottom and sides with foil; set wrapped springform pan in roasting pan.This is to keep the water out of the springform pan while the cheesecake bakes.

Pour filling into springform pan and smooth surface; set roasting pan in oven and pour enough of your boiling water to come about halfway up side of springform pan.

Bake until center of cake is slightly wobbly when pan is shaken, and center of cake registers 145 to 150 degrees on instant-read thermometer, about 1 1/2 hours.
  • For baking at altitude. Subtract 2 degrees for each 1000 feet of altitude. For Denver, the center of the cake should register 140 degrees.
Set roasting pan on wire rack and use paring knife to loosen cake from sides of pan. Cool until water is just warm, about 45 minutes. Remove springform pan from water bath, discard foil, and set on wire rack; continue to cool until barely warm, about 3 hours. Wrap with plastic wrap and refrigerate until chilled, at least 4 hours or up to 3 days.

5. TO SERVE: Slide thin metal spatula between crust and pan bottom to loosen, then slide cake onto serving platter. Let cheesecake stand at room temperature about 30 minutes, then cut into wedges and serve.

Monday, July 06, 2015

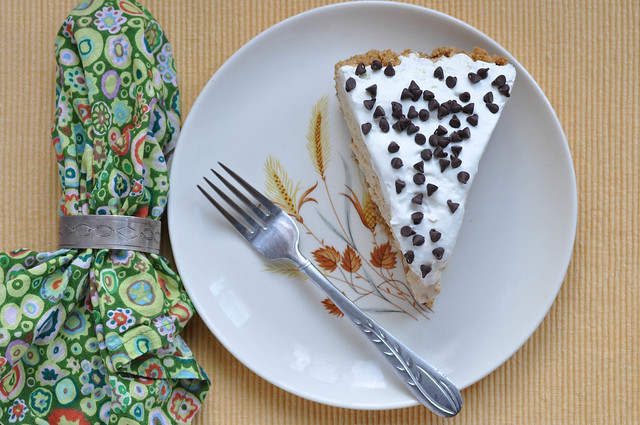
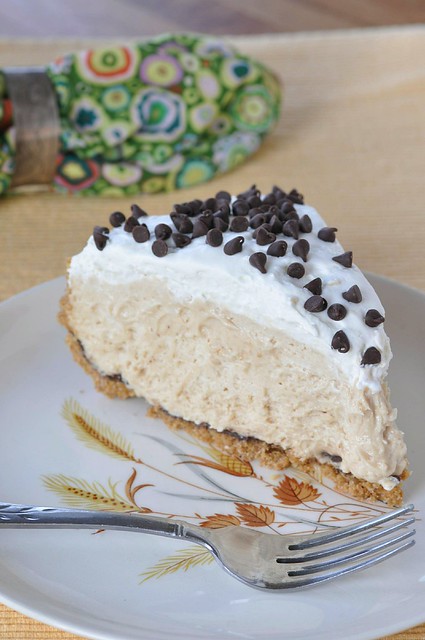
Fluffy No-Bake Peanut Butter Pie

Fluffy No Bake Peanut Butter Pie from fact Womand and Buttercream Lane

This is the perfect dessert to make when it's too hot to turn on the oven or even a burner. We love to go to a very small town cafe about a half an hour away for their pan fried chicken, cooked to order, and their homemade pies. 

The Castle Cafe always has a killer banana cream pie but every few months the chef will get in a mood to make a Chocolate Peanut Butter Pie that is one of the best things I've ever had and I'm not even a big peanut butter person. Note the "only every few months" part of that- it's not nearly often enough so, I had to play with some recipes to come up with one that tastes just like his!!! We all agree that this is a perfect copy!

One of the secrets to his great pies is his chocolate coated graham cracker crusts. He uses it for his Banana Cream Pie and his Peanut Butter Pie. Brilliant! The crust never get's soggy!!  I hope you enjoy this pie as much as we do!


For a Printable Version of this recipe- Click Here! 

Ingredients

Pie Crust- Makes one 9" pie crust- You can also just buy one!!! 

  • 1 package from a box of graham crackers- about 10 sheets of crackers
  • 1/3 cup of sugar
  • 1/3 cup of melted butter
  • 3/4 of a cup of chocolate chips

Peanut Butter Filling

  • 1 1/2  8oz packages of low fat cream cheese at room temperature(12 oz)
  • 1 1/2 cups of creamy peanut butter- store bought not the fresh kind. I like Jif
  • 3 TBS of water or milk
  • 1 1/2  cup of powdered sugar- divided into 1 cup and 1/2 cup
  • 1 1/2 cups of heavy whipping cream
  • 1/2 cup of chocolate chips- Optional- you can mix some into the filling or you can just top the pie with some or both. 

Topping

  • 1/2 cup whipping cream
  • 1/4 cup powdered sugar
  • 1/2 cup of mini chocolate chips- Optional
Peanut Butter Pie from Fact Woman & Buttercream Lane

Instructions 

Pie Crust

  1. Preheat your oven to 375º
  2. While the crackers are still wrapped, press of the sides, top and bottom to start to break them up. 
  3. Place the crackers into a food processor. You can also put everything into a large zip lock bag and crush and mix the ingredients in the bag. 
  4. Add the sugar
  5. Pulse until the crackers are a fine crumb
  6. Pour the melted butter over the crumbs and pulse until all combined. 
  7. Press the crumbs into the bottom of a 9" pie plate. I use a measuring cup to press it in nice and tightly. 
  8. Bake for 7 minutes
  9. As soon as you take the crust out of the oven, sprinkle the chocolate chips over the bottom of the crust. 
  10. Let it sit for 5 minutes until the chocolate chips are melted. 
  11. With the back of a spoon, spread the melted chocolate over the bottom and up the sides of the crust. 
  12. Place in the refrigerator until cool 

Peanut Butter Filling

  1. In a  mixing bowl, beat the whipped cream with 1/2 cup of the powdered sugar until it forms stiff peaks. That means when the beaters are pulled up out of the whipped cream, the points stand up straight. 
  2. In another mixing bowl, place your 12 oz of softened cream cheese, the 1 1/2 cups of peanut butter, 1 cup of powdered sugar and 3 TBS of water. Beat until well combined and slightly fluffy. 

  3. Take 1/3 of the whipped cream and stir it into the peanut butter mixture to lighten it. 
  4. Take the remaining whipped cream and fold it into the peanut butter mixture and fold until all combined. 
  5. Spoon the peanut butter filling into the chilled crust and place in the fridge for at least 2 hours. 

Topping:

  1. In a  mixing bowl, beat the whipped cream with 1/2 cup of the powdered sugar until it forms stiff peaks. That means when the beaters are pulled up out of the whipped cream, the points stand up straight. 
  2. Spread the whipped cream over the top of the pie and sprinkle on the  mini chocolate chips. 
  Note: You can beat all 2 cups of whipped cream and the 3/4 cup of powdered sugar together- just remember to pull out a quarter of it to top the pie with before mixing the whipped cream into the peanut butter mixture. It's up to you! I tend to forget the pull out the topping so I beat the cream in separate batches! 
Peanut Butter Pie from Fact Woman & Buttercream Lane

Friday, July 03, 2015

Easy, Moist Shortcake or Vanilla Cake for Berries- made all in one bowl!!! An Egg Free Cake!

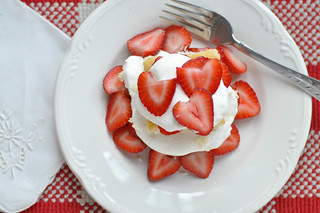
Strawberry Shortcake from Fact Woman & Buttercream Lane
 I'm not a fan of the dry, crumbly, biscuit style of shortcake. I want a moist tender cake for my berries.  Tender and moist but can stand up to the weight of a ton of berries and whipped cream.

16 years ago, we ordered the strawberry shortcake at a restaurant that sounds like The Black Eyed "Bee" and I was in heaven. It was the perfect cake for berries. I had to have the recipe and with a bit of flattery and begging, the chef shared the recipe with me. The one catch was, he had to leave one ingredient out to give it to me. Thankfully, he made it easy when he told me that it was a vanilla cake and guess what ingredient was missing?
We always have this on Easter to usher in berry season and is one of our favorite spring and summer treats.  It's so fast and easy to mix up and bake. I hope you enjoy it as much as we do. It's delicious with any kind of summer fruit. peaches, berries or just by itself with some whipped cream as the icing. Because my granddaughter is very allergic to eggs, this eggless cake has now become her birthday cake recipe.
Moist Vanilla Strawberry Shortcake

DSC_9473.jpg
Makes one 9x13 pan or 12 cupcakes or one jellyroll pan
Ingredients
  • 3 cups of flour
  • 2 cups of sugar
  • 1 1/2 TBS baking powder
  • 1 cup melted butter
  • 2 cups milk
  • 1 1/2 tsp vanilla

Instructions
  1. Preheat oven to 350°
  2. In a 2 cup glass measuring cup or a microwavable container- microwave 1 cup of butter for 60 seconds or until melted. I leave the sticks in the wax paper and micriwave it that way. No spatters and you just have to pull them out when it's melted. Easy and no mess. 
  3. In a large bowl stir together the flour, sugar and baking powder
  4. Stir in the milk and vanilla then the melted butter and mix well. There may be a few small lumps but just leave them. Don't over stir! 
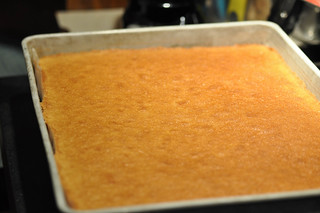
  5. Pour batter into a greased pan and bake in the preheated oven until golden on top and a toothpick comes out clean. 
  6. Baking Times: 
    1. For a 9x13 or cupcakes-  25 to 30 minutes  
    2. For jelly roll pan- or 20 mins f. 
    Strawberry Shortcake from Fact Woman & Buttercream Lane
For a large half sheet pan 2”x13”x18”- Double the recipe and bake for 40 to 45 minutes. 

Wednesday, July 01, 2015

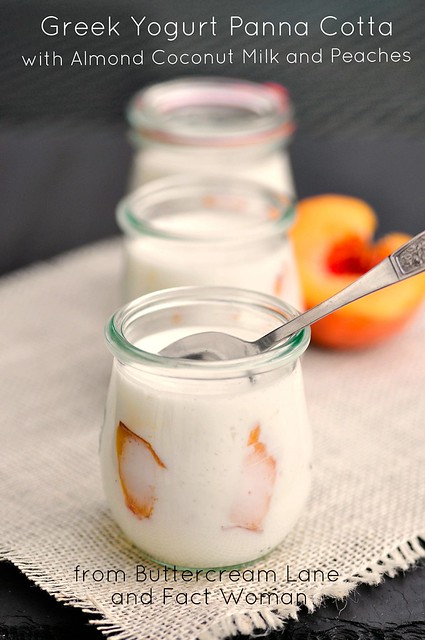
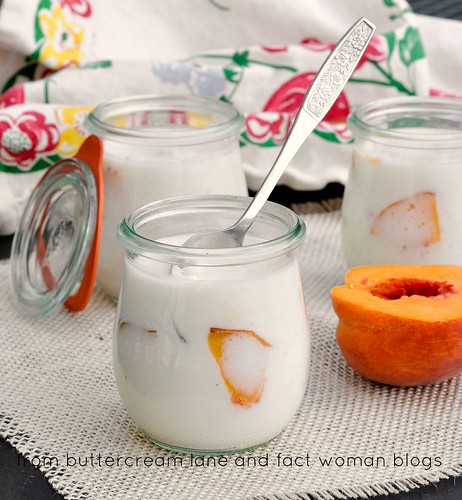
Greek Yogurt Panna Cotta Made with Almond Coconut Milk and Peaches. Gluten Free and Lactose Friendly

Greek Yogurt Panna Cotta with Fresh Peaches that's Gluten Free from Buttercream Lane and Fact Woman
Panna Cotta is one of those desserts that sounds much harder to make than it is. Once I discovered how easy it was to make, I make it often. It only takes about 4-5 minutes to whip together and then an hour or so to chill. I came up with this recipe when I wanted something a little different that I could make for a dessert but also eat for breakfast and not feel guilty! I used a combination of Nonfat Greek yogurt and almond coconut milk as the base. It turned out thick and rich and delicious and guilt free. Because it uses Greek yogurt and almond milk it doesn't bother my lactose sensitive stomach at all. If you're lactose sensitive and yogurt doesn't bother you then you'll love this even more! 

I feel so blessed to live in Colorado, especially during the summer peach season.  The peaches here are the kind of peaches that when you cut or bite into them, the juice just flows out and the perfumed scent fills the room. They are so sweet and so delicious! Just writing about them is making me want to go cut another one but I have to pace myself I decided to chop some up to put into this Panna Cotta and I was not disappointed. If you don't like peaches you can use almost any fruit except fresh pineapple or fresh papaya- their enzymes will prevent the mix from setting up. Strawberries, blueberries and raspberries are amazing! 


Greek Yogurt Panna Cotta with Fresh Peaches from Buttercream Lane and Fact Woman

You can make it in small jars like I did and just eat it out of the jar, or you can make it in small ramekins that you can un-mold onto a plate. You can also make it in a regular 8-9" round cake pan and un-mold that onto a large plate to serve. I just like eating it out of my cute Weck jars plus I didn't feel like un-molding anything!  If you want to un-mold it- Lightly grease the inside of your pans/ ramekins so that the panna cotta will come out easier. I also get a bowl of hot water and hold the mold in the water for a few seconds to loosen it before un-molding.

 Greek Yogurt Panna Cotta  Makes 5-6  medium servings

 Ingredients:

  • 1 envelope of unflavored gelatin 
  • 1 cup of Almond or Coconut or  The Blue Diamond Almond Coconut Milk. (you can use unsweetened or sweetened it doesn't matter. but if you use sweetened, you might cut back on the agave or sugar a bit) 
  • 1/4 cup agave syrup or honey or 1/3 cup sugar to taste
  • 1- 17 oz container of Plain Greek Yogurt- nonfat, 1 %, whole milk- doesn't matter
  • 1 tsp vanilla- optional
  • 2 large or 3 medium peaches chopped- About a cup to a cup and a half depending on how much fruit you want in each. You can also use strawberries, blueberries, blackberries or apricots. Any fruit but fresh Pineapple or papaya- they have enzymes in them that will prevent the gelatin from setting up so you'll end up with a yogurt and fruit drink! 

Instructions:


  1. Take a 1/4 cup of the almond milk  in a small bowl and sprinkle the gelatin over the top. Let sit 1-2 minutes while you get the rest of the ingredients together and chop up the peach. 
    1. Greek Yogurt Panne Cotta from Buttercream Lane and Fact Woman Blogs
  2. Add the yogurt  and 1/4 of the almond milk to a small bowl- (preferably one with a spout to pour out of) and whisk together until smooth. 
  3. Take 1/2 cup of the almond milk and the sweetener and place in a small saucepan 
  4. Over Medium heat, heat the milk and sweetener until mixed together and all dissolved. 
  5. Add the softened gelatin to the pan and stir until the gelatin is dissolved. You don't have to bring it to a boil. Heat just until everything is dissolved. 
  6. Remove from the heat and pour the warm mixture into the yogurt.
  7. Add the vanilla to  it if you wish. I think real vanilla tastes like plastic and the fake stuff is worse!
  8. Pour the mixture into your containers- filling 1/2 way. 
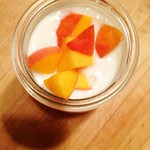
  9. If you are adding fruit, add the chopped fruit and push the fruit down into the yogurt mixture with a spoon. Then top with the remaining yogurt mixture  so that the fruit is covered. 
  10.  Greek Yogurt Panne Cotta from Buttercream Lane and Fact Woman Blogs Greek Yogurt Panne Cotta from Buttercream Lane and Fact Woman  Greek Yogurt Panne Cotta from Buttercream Lane and Fact Woman Blogs
  11. Chill for 1-3 hours depending on the shape of your container. a thinner layer will chill in an hour. A 5 oz jar will take closer to 3 hours. 
                               Greek Yogurt Panne Cotta from Buttercream Lane and Fact Woman
    The panna cotta  will still jiggle a bit but not be  set up. Think a little less gigglier than jello. It's really a softer jello consistency. 

    Greek Yogurt Panna Cotta with Fresh Peaches from Buttercream Lane and Fact Woman

    Monday, April 27, 2015

    Easy Moist Cake for Strawberry Shortcake or any other Fruit! Egg Free Cake

    Strawberry Shortcake from Fact Woman & Buttercream Lane
     I'm not a fan of the dry, crumbly, biscuit style of shortcake. I want a moist tender cake for my berries. 20 years ago, we ordered the strawberry shortcake at a restaurant and I was in heaven. It was the perfect cake for berries. It's moist and dense and perfect with any kind of berry or just on it's own.

     I had to have the recipe and with a bit of flattery and begging, the chef shared the recipe with me. The one catch was, he had to leave one ingredient out to give it to me. Thankfully, he made it easy when he told me that it was a vanilla cake and guess what ingredient was missing?
    We always have this on Easter to usher in berry season and is one of our favorite spring  and summer treats.  It's so fast and easy to mix up and bake. I hope you enjoy it as much as we do.

    It's also EGG FREE! My granddaughter is very allergic to eggs,so this was her birthday cake this year. Pour into round pans and frost with whipped cream for a wonderful layer cake.
    Moist Vanilla Strawberry Shortcake

    DSC_9473.jpg
    Makes one 9x13 pan or 12 cupcakes or one jellyroll pan or 2 8" rounds
    Ingredients
    • 3 cups of flour
    • 2 cups of sugar
    • 1 1/2 TBS baking powder
    • 1 cup melted butter
    • 2 cups milk
    • 1 1/2 tsp vanilla

    Instructions
    1. Preheat oven to 350°
    2. In a 2 cup glass measuring cup or a microwavable container- microwave 1 cup of butter for 60 seconds or until melted. I leave the sticks in the wax paper and micriwave it that way. No spatters and you just have to pull them out when it's melted. Easy and no mess. 
    3. In a large bowl stir together the flour, sugar and baking powder
    4. Stir in the milk and vanilla then the melted butter and mix well. There may be a few small lumps but just leave them. Don't over stir! 
    5. Pour batter into a greased pan and bake in the preheated oven until golden on top and a toothpick comes out clean. 
    6. Baking Times: 
      1. For a 9x13 or round layers-  25 to 30 minutes  
      2. For jelly roll pan or cupcakes-  20 mins  or so.
      Strawberry Shortcake from Fact Woman & Buttercream Lane
    For a large half sheet pan 2”x13”x18”- Double the recipe and bake for 40 to 45 minutes. 

    Monday, April 20, 2015

    Fast Orange Almond Cake- Gluten Free

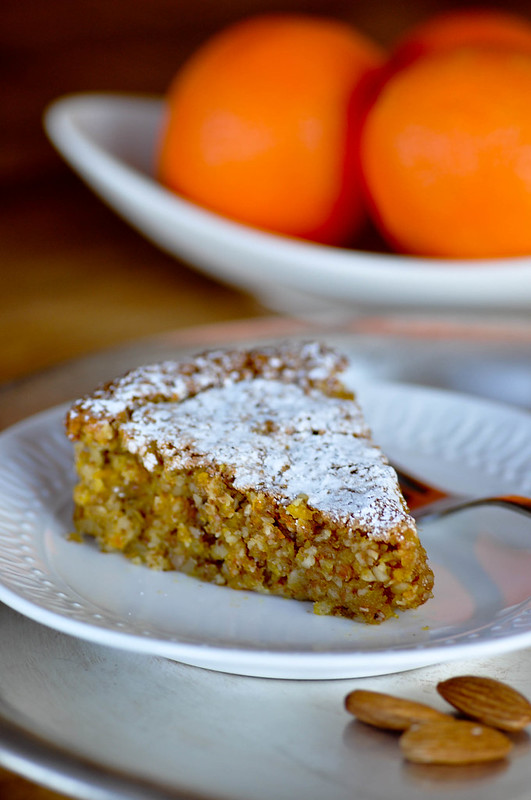
    A Gluten Free Orange Almond Cake from Buttercream Lane and Factwoman

    It's Friday evening. We've eaten dinner, kitchen's all cleaned up, the last load of laundry is in the dryer, I put on some sweats and I sit down to watch, Say Yes to the Dress, and have some Pinterest Time. I 'm looking through the pins and see a delicious looking Orange Cake and have to have some- RIGHT NOW! I look at the ingredients and have everything except the Almond meal, but I have almonds, so I'm all set. I grind up the almonds THEN read the next step- WHAT??? I have to Boil the oranges for 15 minutes, drain, refill, bring to a boil for another 15 minutes, then let them cool!!!????  (OK, I should have read the recipe instead of just looking at the pictures of each step- that was not a step in the photos- My Bad.)  No way was I doing all that! So I do some research.

    You're supposed to boil the oranges to soften the skins up and make it easier to cook. But, I think to myself what a wonderful world.... Woops- I''m not supposed to be singing right now... I think to myself- if you boil the oranges and drain the water- wouldn't all the flavorful oils from the peel go down the drain? That's my conclusion.  So I came up with a new plan, played with the recipe, made it 3 times and here is a delicious alternative that only took 8 mins to get into the oven and that  time includes grinding the almonds. Plus Bonus- I used the food processor for every step. less to clean up! I could have made the original recipe faster but where would the fun be in that?!!!

    Flourless Orange Almond Cake                                               

    Inspired by Scandi Home's Flourless Orange Cake

    Ingredients:

    • 2 whole medium size oranges If you only have big ones just use 1 1/2 
    • 3 eggs
    • 1 cup sugar
    • 3 cups of almond meal or 3 cups of whole almonds that you'll grind up
    • 1 tsp Baking Powder

    Instructions:

    1. Grease and flour a 9" spring form pan-  You can do a regular 9 " round but it is harder to get it out of the pan in pretty slices. 
    2. If you have almond meal- skip this step- Place 3 cups of whole almonds into the bowl of your food processor. Pulse until the almonds are a fine even texture. I actually left mine a little rougher because I like more texture in  the final cake. It's up to you but DON"T over process or you'll be eating almond butter sandwiches for the rest of the month! Remove the meal from the bowl and set aside. 
    3. Stir 1 tsp of baking powder into the meal.
    4. Zest all skin off of the 2 oranges and place in a bowl.
    5. Preheat oven to 340º. 
    6. Peel the oranges then slice or pull into the sections and place the pieces into the Food processor bowl. There will be some almond meal in there but so what, it's all going to be mixed together in a minute. Pulse until the oranges are a nicely pureed. Pour the puree in with the zest and set aside. Try to get as much of the orange out of the bowl as you can. 
    7. Crack 3 eggs into the processor bowl and add the 1 cup of sugar. Turn on processor and process until the eggs and sugar are thick and pale yellow. About 45- 60 seconds. 
    8. Add the almond meal, the orange puree and zest into the egg mixture and process for about 10-15 seconds until combined. 
    9. Pour batter into prepared cake pan.
    10. Bake for 50 minutes or until a toothpick can be inserted into the center and come out clean.
    A Gluten Free Orange Almond Cake from Buttercream Lane and Factwoman
    Serve dusted with Powdered sugar.
    A Gluten Free Orange Almond Cake from Buttercream Lane and Factwoman


    Blogging tips